Documentation of "Learning Internet-of-Things: IoT Basic Experiments using ESP8266, Arduino and Xbee"
This is a simple trainer kit module to help you understand the basic concept of IoT infrastructure. This project is powered by Faculty of Engineering, Atma Jaya Catholic University of Indonesia (AJCUI)
There are 7 (seven) experiments that will cover three IoT segmentation:
- Device
- Connectivity
- Cloud and Application
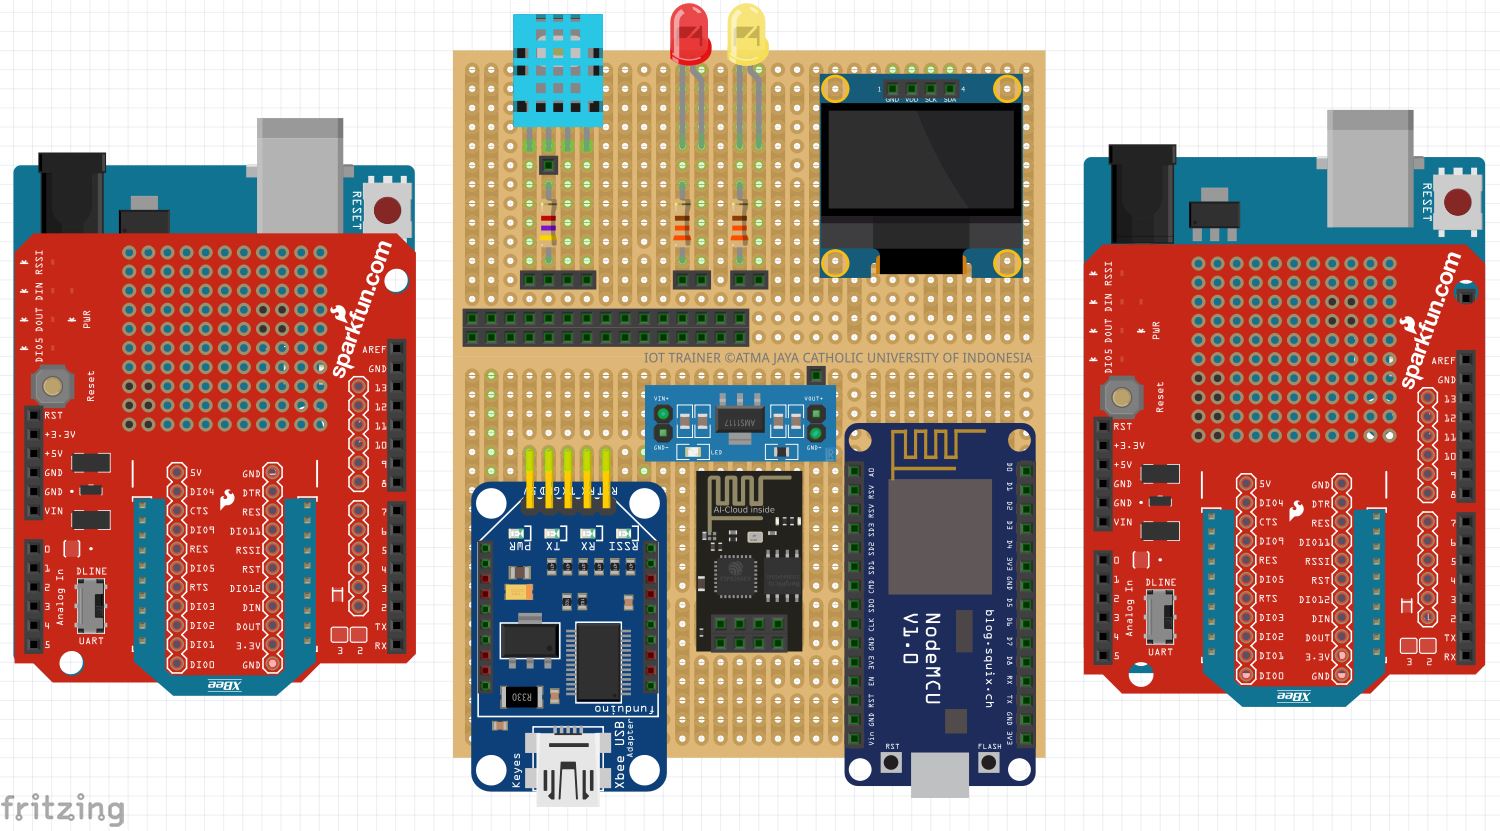
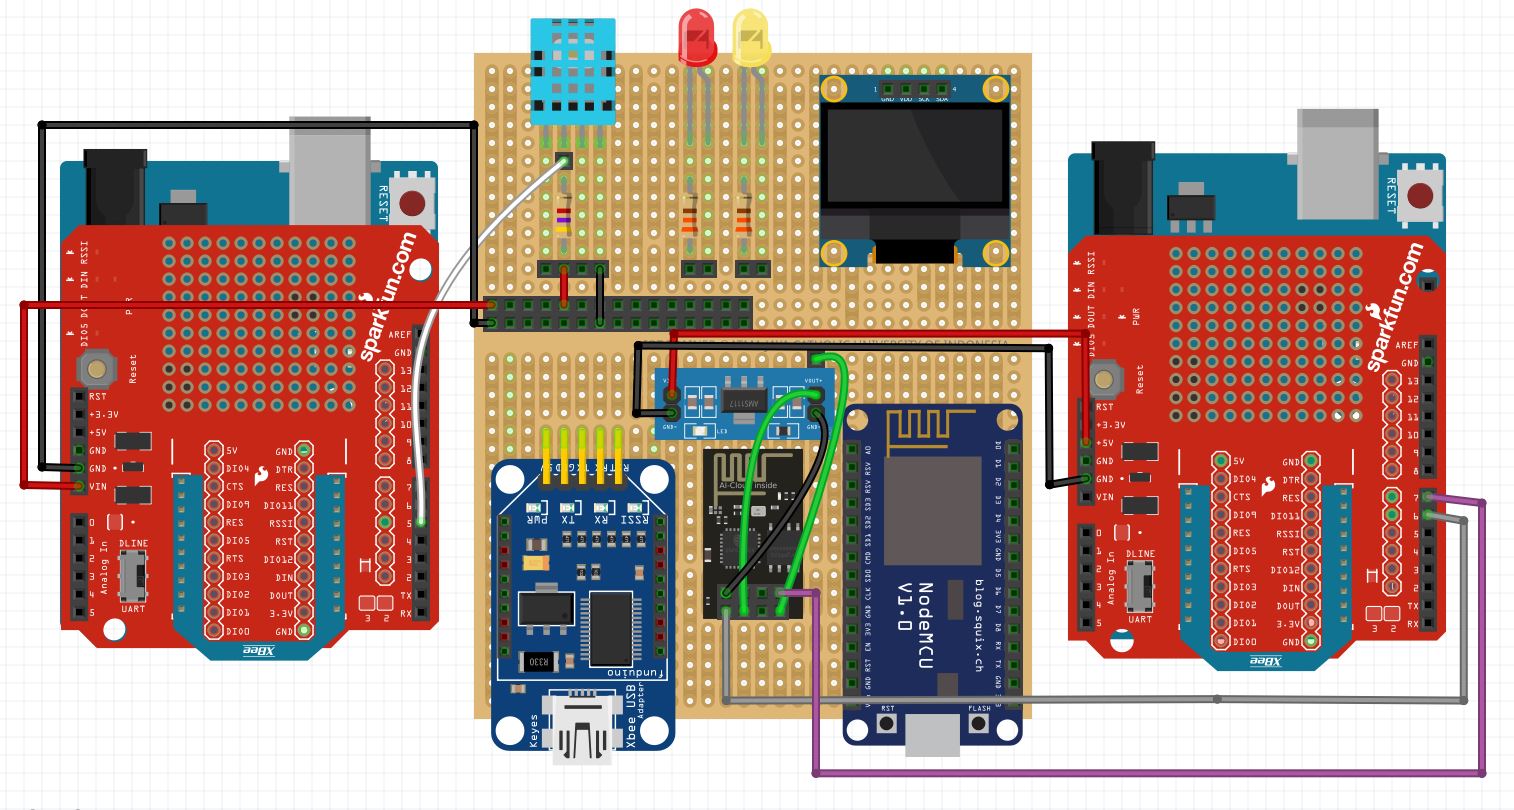
Schematic design for our IoT Trainer is shown below:
- Experiment 1: DHT sensor with OLED display
- Experiment 2: DHT 11 with Xbee Connectivity
- Experiment 3: LED with local host
- Experiment 4: Tunneling with Ngrok
- Experiment 5: Xbee Network Connected to ESP8266
- Experiment 6: ThingSpeak
- Experiment 7: Web Hosting
We will use one PC or laptop to:
- Install Arduino IDE on PC
- Install XCTU on PC
- Create ThinkSpeak Account
- Create 000webhost Account
- Install HTTPS shortcut on Android Phone
We also need to understand all the pin from our modules
- NodeMCU ESP8266 pin: https://www.theengineeringprojects.com/2018/06/introduction-to-arduino-uno.html
- XBee S2C pin: https://components101.com/wireless/xbee-s2c-module-pinout-datasheet
- Arduino Uno pin: https://store.arduino.cc/usa/arduino-uno-rev3
The first experiment is to read the data from a sensor (DHT11), and show the current temperature and humidity on the OLED display. The data has not been sent to any server yet.
the code available on: Code for Experiment 1.
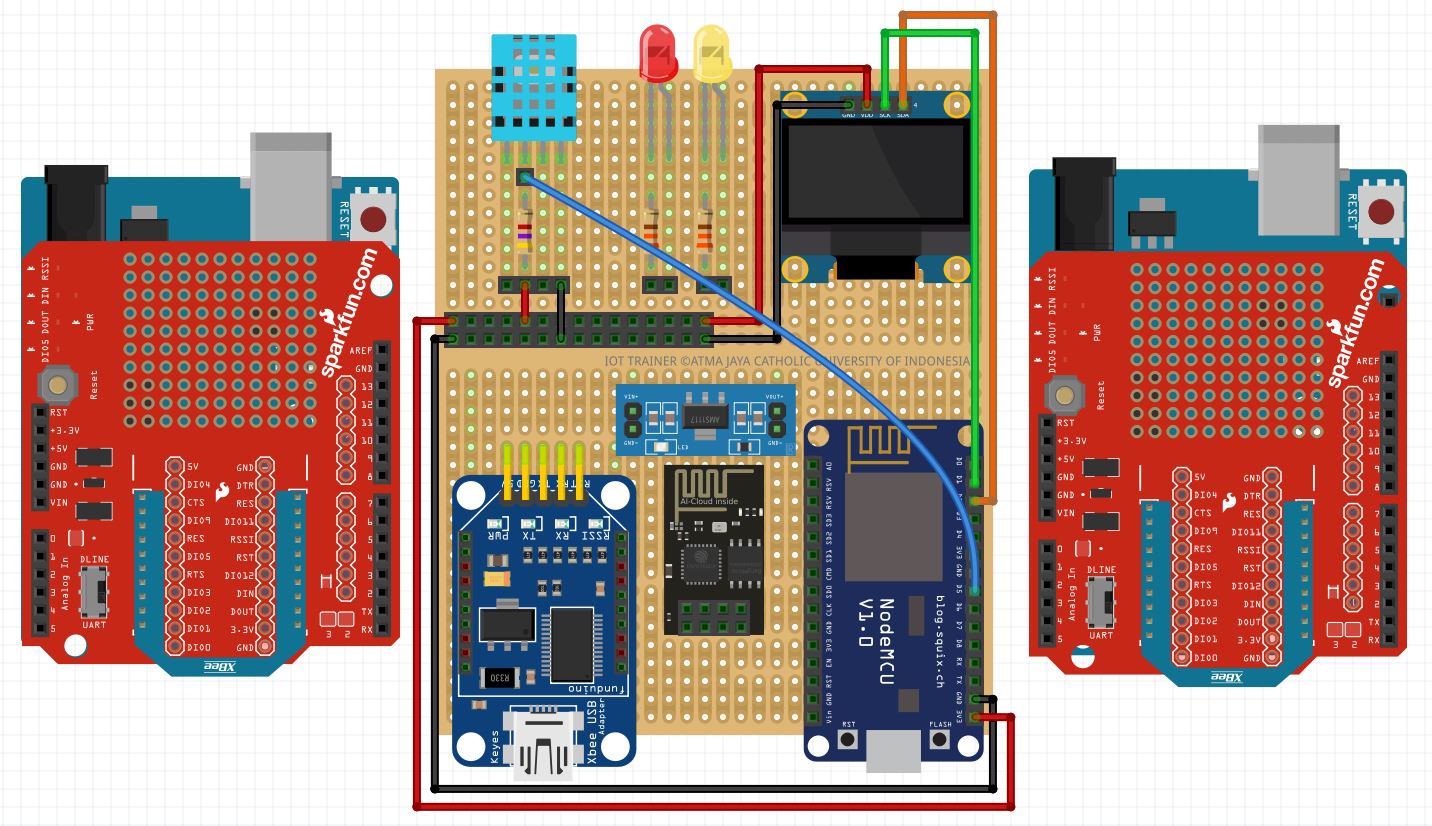
The circuit for experiment 1:
 when you see the temperature and humidity value on OLED display, you successfully finish the first experiment.
The next experiment is reading DHT Sensor who connected to Xbee and Arduino. In the next section, the Xbee will connected to other Xbee, in which combined with an ESP8266. This experimeny continues to Experiment 5.
the code available on: Code for Experiment 2.
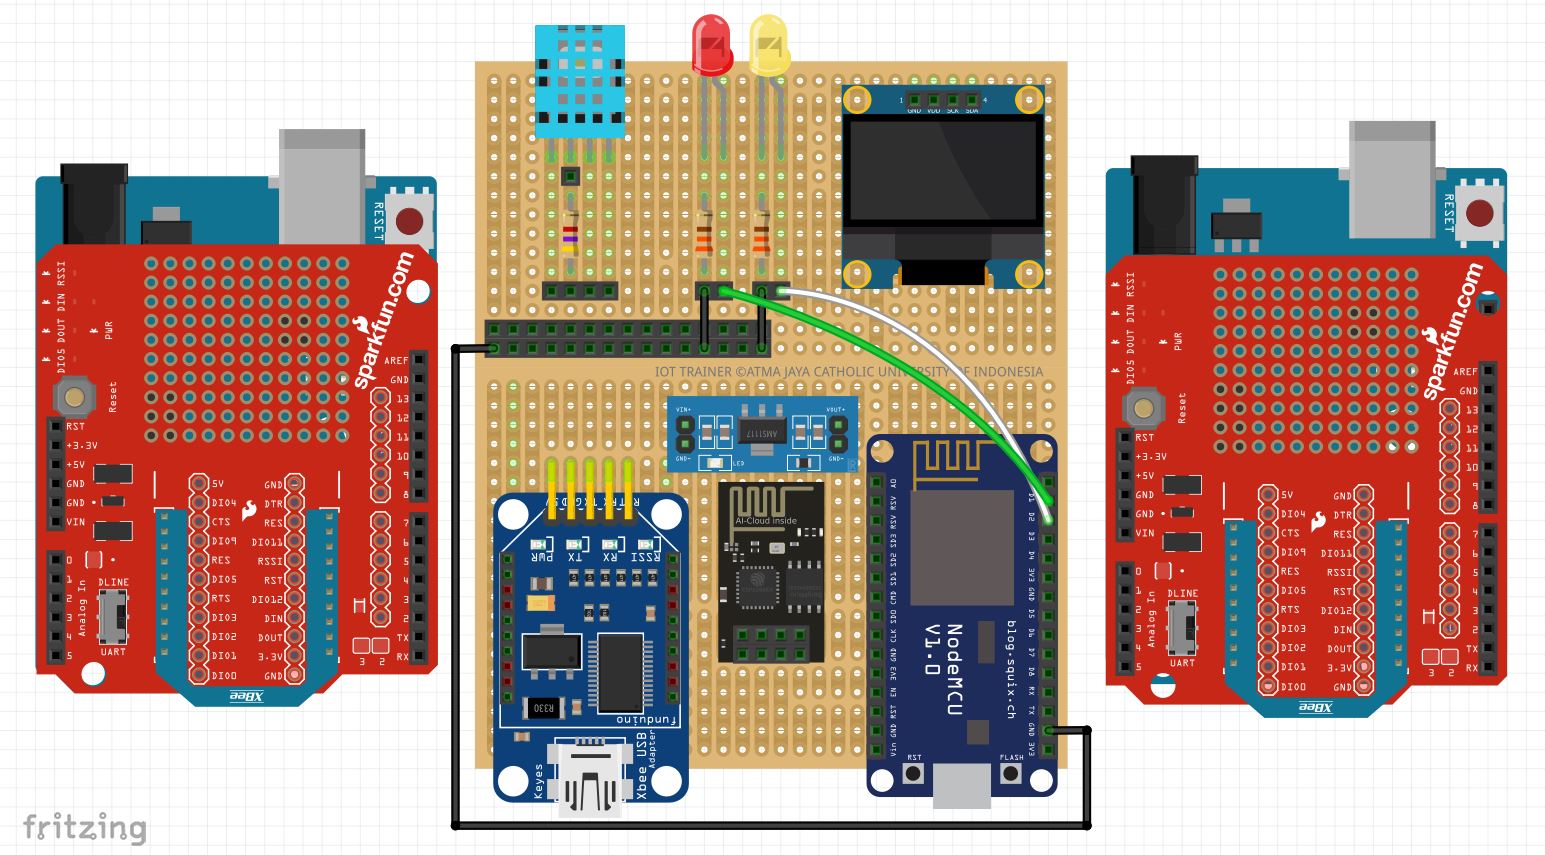
The circuit for experiment 2:

to config Xbee module, we need to take out the XBee from Arduino Shield, connect it to the Zigbee USB adapter, configure the Xbee via Laptop with XCTU software.
the example of XCTU software display:
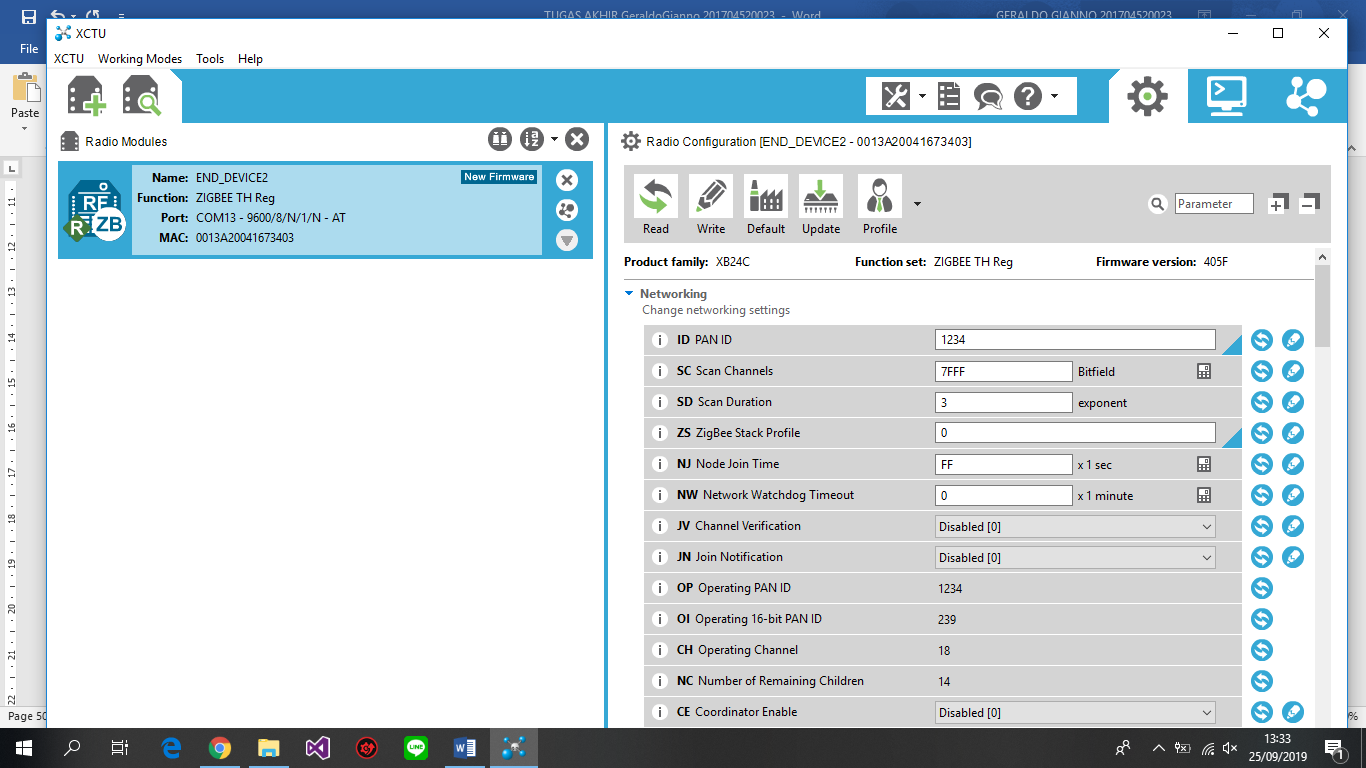 Follow this instruction:
- Click Search
- Choose COM13 (check the checkbox)
- Set the baud rate 9600 and data bits 8. click finish
- Add selected device, click device to access the Zigbee parameter
- Set the PAN ID (from 0 to FFFF hex). For this, we use 1234.
- Set the destination addres, Node identifier,
- click write button
When you can see the temperature and humidity value from COM port, you succesfully finish the second experiment.
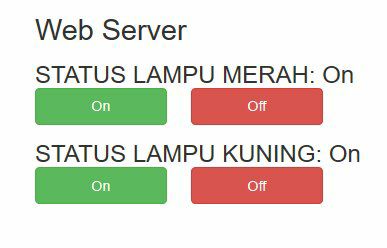
The third experiment is connecting the LED, and controlled via local host in which accessed by a web browser
the code available on: Code for Experiment 3.
The circuit for experiment 3:
 You will have a local server to control the LED. The display on the local web server:
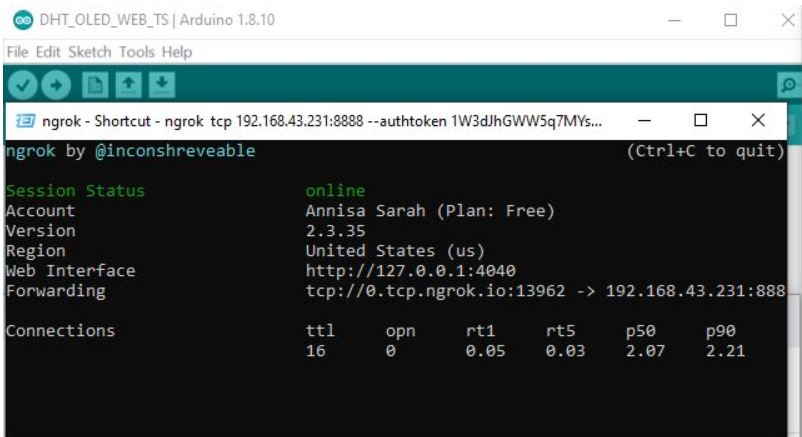
This experiment aims to understand the connectivity in IoT, by tunneling our previous project devices network, Experiment 1 and 2, via Ngrok so it can be accessible to Internet.
- First, we need to create ngrok account on https://ngrok.com, download the ngrok.
- We need to save a copy of our AUTH token from ngrok’s website.
- To connect our ngrok software to our account, we need to copy the AUTH token on the ngrok software.
- In the terminal, write the following command:
ngrok tcp 192.168.43.99:8888 --authtoken 1W3dJhGWW5q7MYsMljaaT9CydtX_3hRTjErX1xWjqB7AW1qpj- noted that the TCP IP Address is unique to each ESP8266, and the Auth Token is unique to each ngrok account. If the connection is succesfull, we can see the Tunnel Status as online
On our web browser, we may copy the Forwarding Address tcp://0.tcp.ngrok.io:13962 to monitor our ESP8266 DHT Server, or tcp://0.tcp.ngrok.io:18922 to a control our LEDs from anywhere in the world. However, the ngrok must be always on.
an example of running Ngrok can be seen here:
In this experiment, we also introduced control buttons that operate on Android in mobile phone, as can be seen in Figure below:
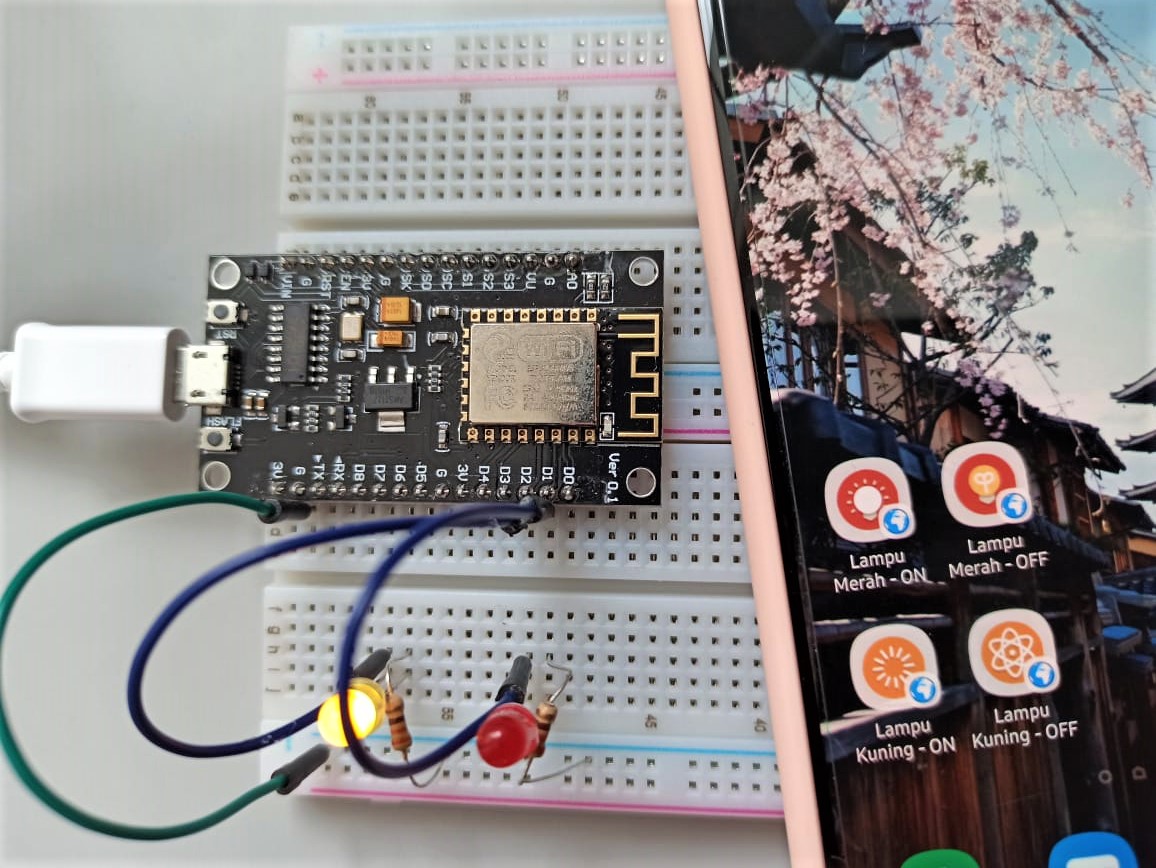
The application to make this button is called HTTP Shortucs, which is free and available on Google Playstore. To configure these buttons, we need the ESP8266 address for the basic request setting, and input the authentication credentials. However, we can not see the current status of both LEDs, we can only control it remotely.
This experiment is an expansion of Experiment 2. There are two modules: DHT-Xbee module, and ESP8266-Xbee module. The main idea is to place the DHT 11 sensor at some distance to the server (ESP8266-Xbee), so the DHT-Xbee module will send the temperature and humidity data to the router, and the router module will upload it to the internet via a free web hosting, which will be explained on the next section.
The circuit can be seen below:
Noted that the ESP8266 is ESP-01 type, not the ESP8266-12E (NodeMCU) that we use for other experiments. The ESP-01 is consume less energy than the ESP8266-12E. But the ESP-01 does not comes with its own microcontroller chip, like the ESP8266-12E do.
ThingSpeak is an IoT analytics platform that enables users to aggregate, visualize, and analyze data streams. This platorm also powered by MATLAB® analytics, and users can write and execure MATLAB code to perform advance processing. To begin, we need to create an account for ThingSpeak on https://thingspeak.com, then create a new channel. We create two fields: temperature and humidity. Each channel has unique Channel ID, that we need to write on our devices. We use:
ThingSpeak.setField(1,t);
ThingSpeak.setField(2, h);
ThingSpeak.writeFields(myChannelNumber, myWriteAPIKey);
Where t is a variable to save temperature reading, and h is a variable to save humidity reading. myChannelNumber is the unique Channel ID, and myWriteAPIKey is a command to write the field. The result is shown below:

In practical, many IoT applications use an online website to monitor and control their devices. For beginners, it recommended to build a free website with limited features just to have a grasp of understanding how the data has been collected, stored and process in the cloud. We use a free website hosting, that has a capability to have its own server and front-end design. Firstly, we must create an account, create database, set the fields, and finally design the user interface. To mimic the ThingSpeak capability of showing the recorded data as a table, we also provide the table that will be updated each 5 seconds. The website display is shown in Figure below:
.jpg)
question and suggestion: annisa.sarah@atmajaya.ac.id