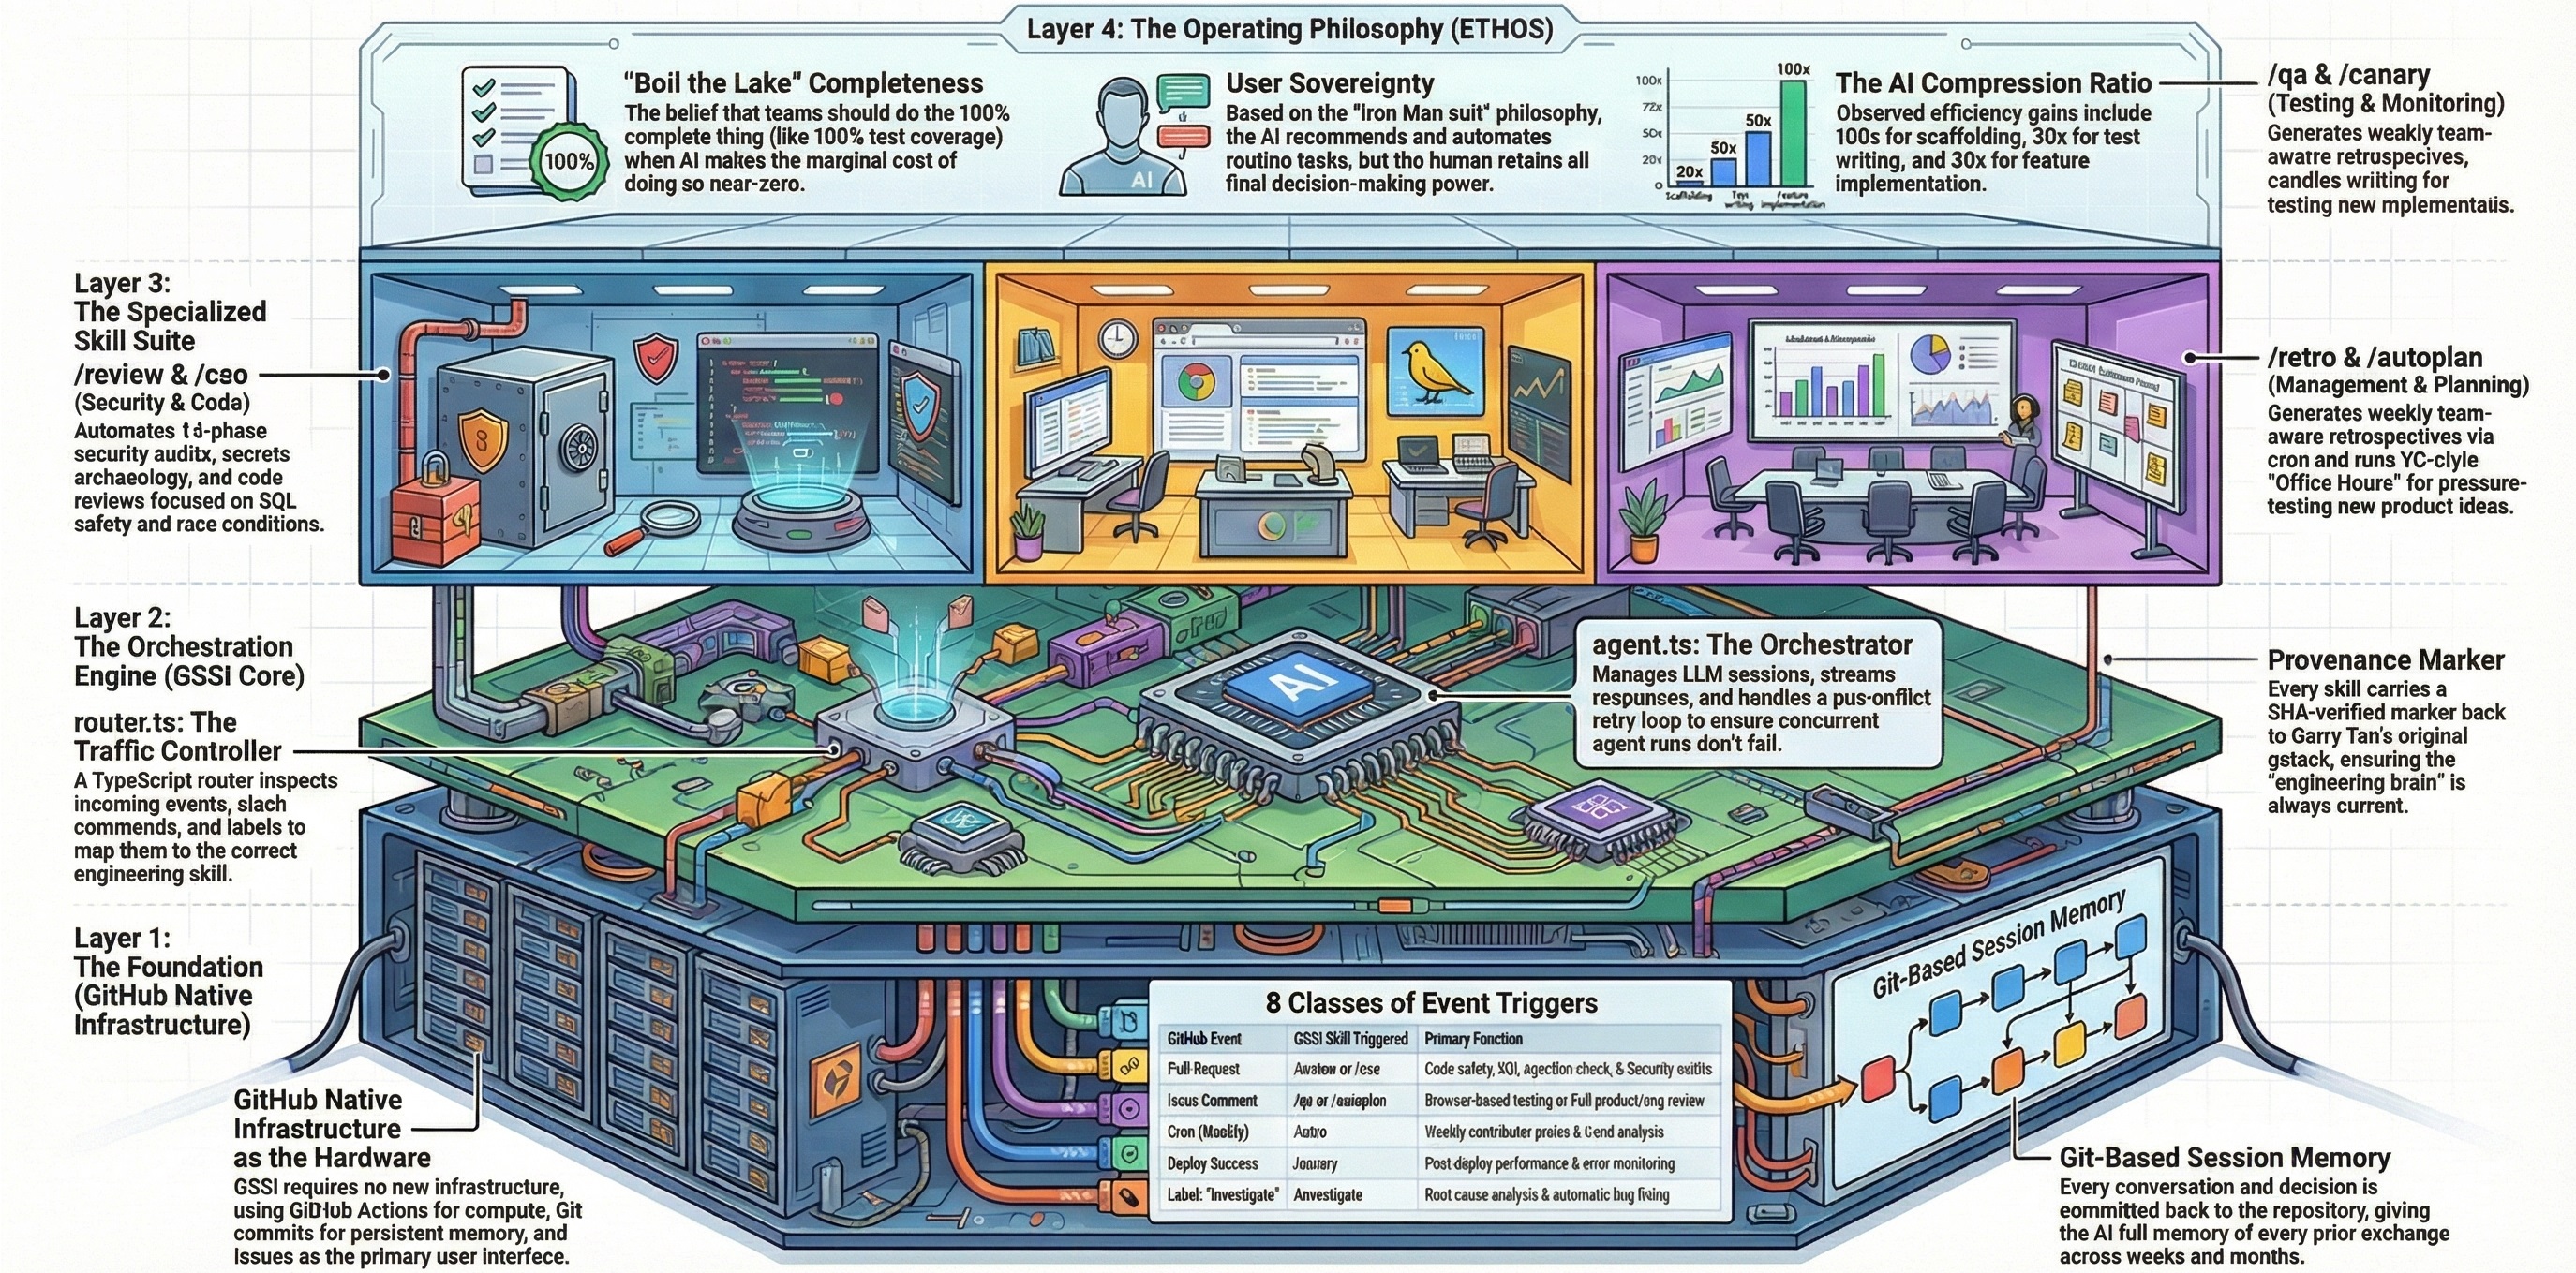
Practical, copy-paste workflows that combine GStack Intelligence commands into end-to-end engineering processes. Each recipe shows the exact sequence of actions for a specific scenario.
Each workflow shows:
- When to use it — the scenario this workflow addresses
- Prerequisites — what you need before starting
- Steps — numbered actions with the exact commands to run
- What happens — what the system does at each step
- Success criteria — how you know the workflow completed successfully
When to use: You have a new feature idea and want to take it from concept to shipped code with full engineering rigor.
Prerequisites: GStack Intelligence installed, a running web app (for QA), access to a staging environment.
Phase 1: Discovery
- Open a GitHub issue with the title: "Feature: [your feature description]"
- In the issue body, describe what you want to build, who it's for, and why it matters
- Add the
office-hourslabel to the issue - Answer the diagnostic questions in the agent's response
- Read the design document the agent produces — this is your product foundation
Phase 2: Planning
- Comment
/autoplanon the same issue - Answer the premise challenge questions (the ONE question that's never auto-decided)
- Select a scope mode (SCOPE EXPANSION, SELECTIVE EXPANSION, HOLD SCOPE, or SCOPE REDUCTION)
- Review the CEO review findings — scope, strategy, dream state mapping
- Review the Design review findings — information architecture, interaction states, responsive specs
- Review the Engineering review findings — architecture diagrams, test coverage map, failure modes
- Approve taste decisions at the final approval gate
- Read the Decision Audit Trail for a record of every automated decision
Phase 3: Implementation
- Create a feature branch:
git checkout -b feature/your-feature - Implement the plan — use the plan file as your specification
- Open a pull request —
/reviewtriggers automatically - Address any CRITICAL findings from the review
- If the feature touches auth, payments, or user data: add the
security-auditlabel for/cso - If the feature has UI: add the
design-reviewlabel for visual QA
Phase 4: Quality Assurance
- Deploy to staging
- Comment
/qa https://staging.myapp.comon the issue to test with a real browser - Review the before/after health scores and fix evidence
Phase 5: Ship
- Comment
/shipon the issue - The agent merges base branch, runs tests, executes pre-landing review, bumps version, updates changelog, creates PR
- Review the ship report and merge the PR
- Publish a release —
/document-releasefires automatically
Phase 6: Verify
- After deployment: comment
/canary https://myapp.comto monitor production - Verify HEALTHY status
Success criteria: Ship report shows all tests passing, review clean, documentation synced, canary HEALTHY.
When to use: A bug is reported in production and you need to investigate, fix, verify, and ship the fix.
Prerequisites: A GitHub issue describing the bug with error messages and reproduction steps.
- Open (or update) a GitHub issue with the bug report — include error messages, stack traces, and reproduction steps
- Add the
investigatelabel to the issue - The
/investigateskill runs the 4-phase methodology:- Phase 1: Root cause investigation (collect symptoms, read code, check recent changes, reproduce)
- Phase 2: Pattern analysis (race condition? nil propagation? configuration drift?)
- Phase 3: Hypothesis testing (3-strike rule — stops after 3 failed hypotheses)
- Phase 4: Implementation (fix + regression test + full test suite)
- Review the debug report — root cause, fix, evidence, regression test
- Comment
/shipon the issue to ship the fix - After deployment: comment
/canary https://myapp.comto verify the fix in production
Success criteria: Debug report shows DONE status with regression test, ship report clean, canary HEALTHY.
When to use: You want to systematically audit and improve your repository's security posture.
- Open a GitHub issue: "Security Hardening Sprint"
- Comment
/cso --comprehensivefor a full deep scan (2/10 confidence bar — surfaces everything) - Review the Security Posture Report — all 14 audit phases
- Create a branch for security fixes
- Fix issues in priority order: Critical → High → Medium → Low
- Open a PR with the fixes —
/reviewtriggers automatically - Add the
security-auditlabel to the PR for a focused re-audit - Comment
/cso --diffon the issue to verify only your changes (no noise from existing issues) - Comment
/shipwhen the audit is clean
For ongoing security: Run /cso on every PR that touches auth, payments, or user data by adding the security-audit label.
Success criteria: Security Posture Report shows no Critical or High findings in daily mode (8/10 confidence gate).
When to use: You're starting a new project or want to establish a cohesive design language for an existing one.
- Open a GitHub issue describing your product — what it is, who it's for, any aesthetic preferences
- Add the
design-consultationlabel - Answer the product context question
- Optionally: ask for competitive research ("research what top products in my space are doing")
- Review the complete design proposal — aesthetic, typography, color, spacing, layout, motion
- Request drill-downs on any section you want to refine
- Review the HTML preview page or AI mockups
- Approve the design system —
DESIGN.mdis written to your repo root
Going forward:
- All
/design-reviewaudits will calibrate against yourDESIGN.md - All
/plan-design-reviewpasses will check alignment with your design system - The design system becomes the visual source of truth
Success criteria: DESIGN.md committed with typography, color palette, spacing scale, and layout grid. All future design reviews calibrate against it.
When to use: You want to establish a continuous improvement practice for your team.
- Enable
/retroinconfig.json:"retro": { "enabled": true, "trigger": "schedule", "schedule": "0 17 * * 5" } - Enable
/benchmarkinconfig.json:"benchmark": { "enabled": true, "trigger": "schedule", "schedule": "0 6 * * *" } - Run
/benchmark https://myapp.com --baselineto capture your initial performance baseline - Commit and push the config changes
Monday — Thursday:
- Open issues for new work, use
/office-hoursor/autoplanfor significant features - Open PRs —
/reviewruns automatically on every PR - Use
/qabefore shipping features
Friday:
/retroruns automatically at 5 PM UTC- Review the retrospective: velocity, quality, test ratio, session patterns, team breakdown
- Identify the top 3 wins and 3 improvements
- Track week-over-week trends
Daily:
/benchmarkruns at 6 AM UTC (if enabled)- Performance regressions are caught before they compound
On every deploy:
/canarymonitors production (if enabled)- Regressions caught within minutes of deployment
Success criteria: Test LOC ratio trending up, fix ratio trending down, deep sessions increasing, performance grade stable or improving.
When to use: You're preparing for a launch and want to ensure everything is polished and production-ready.
Day 1: Audit
- Comment
/qa-only https://myapp.com --exhaustive— full app QA report without making changes - Comment
/cso --comprehensive— deep security scan - Comment
/benchmark https://myapp.com --baseline— capture performance baseline - Review all three reports — prioritize findings
Day 2–3: Fix
- Create a branch for fixes
- Fix Critical and High issues from QA report
- Fix Critical and High security findings from CSO report
- Fix performance budget failures from benchmark
- Comment
/qa https://staging.myapp.com— QA with fixes applied - Comment
/cso --diff— verify security fixes - Comment
/benchmark https://staging.myapp.com— verify no performance regressions
Day 4: Polish
- Add
design-reviewlabel to the PR — visual design audit with automated fixes - Review design score before/after
- Run
/qa-onlyone final time as a clean sweep
Day 5: Ship
- Comment
/ship— automated shipping pipeline - Publish release —
/document-releasesyncs docs - Comment
/canary https://myapp.com— post-deploy monitoring - Verify HEALTHY status
- Comment
/benchmark https://myapp.com— post-launch performance check
Success criteria: QA health score ≥ 90, CSO report clean (daily mode), benchmark grade ≥ B, design score ≥ 80, canary HEALTHY.
When to use: A new developer joins your team and needs to understand the codebase and practices.
- Have them read Getting Started — installation and first commands
- Have them read The Method — the systematic methodology
- Have them open an issue: "Onboarding: [their name]"
- Have them ask questions about the codebase in the issue — the agent has full codebase context
- Assign them a small feature and walk them through the workflow:
- Comment
/autoplanon the feature issue - Review the plan together
- Implement, open a PR (auto-reviewed)
- Comment
/qaif applicable - Comment
/ship
- Comment
- Run
/retroafter their first week — review their "Your Week" section together
Success criteria: New team member can independently use the full workflow from /office-hours to /ship within their first week.
When to use: You're working across multiple repositories and want to track your overall shipping velocity.
- Open an issue in any repository with GStack Intelligence installed
- Comment
/retro global— cross-project retrospective across all AI coding activity - Review:
- Global shipping streak (consecutive days with commits across all repos)
- Per-project breakdowns
- Context switching patterns (how many repos per day)
- Per-tool productivity (Claude Code vs Codex vs Gemini)
- Use the shareable personal card for team standups or personal tracking
Success criteria: Global shipping streak trending up, context switching per day ≤ 3 repos, deep sessions increasing across all projects.
For detailed documentation on any command, see the Command Reference.
| Command | Trigger Type | Browser | Phase |
|---|---|---|---|
/office-hours |
Label: office-hours |
No | Discovery |
/autoplan |
Comment | No | Planning |
/plan-ceo-review |
Comment | No | Planning |
/plan-design-review |
Comment | No | Planning |
/plan-eng-review |
Comment | No | Planning |
/design-consultation |
Label: design-consultation |
No | Planning |
/review |
Auto on PR | No | Implementation |
/cso |
Label: security-audit |
No | Implementation |
/design-review |
Label: design-review |
Yes | Implementation |
/investigate |
Label: investigate |
No | Implementation |
/qa |
Comment | Yes | Shipping |
/qa-only |
Comment | Yes | Shipping |
/ship |
Comment | No | Shipping |
/document-release |
Auto on release | No | Shipping |
/retro |
Scheduled / Comment | No | Operations |
/benchmark |
Scheduled / Comment | Yes | Operations |
/canary |
Auto on deploy | Yes | Operations |
- Command Reference — Detailed docs for each command
- The Method — Philosophy and methodology
- Getting Started — First-day onboarding
- ETHOS — Builder principles